Several days ago my son handed me his favorite sweater. There was a hole. He knows to pay attention to such things as soon as they appear but this was near his elbow, he’s a very active fellow, and he didn’t notice it until it had grown . . . well, you see.
How to wash the feathers of your nest
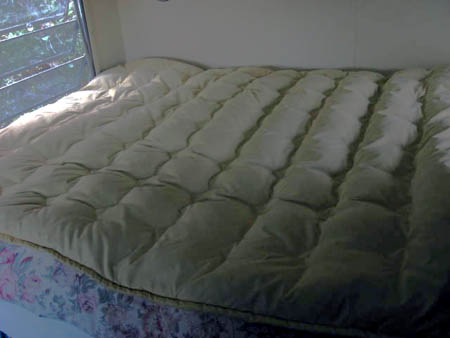
My current bed is my lifetime favorite. I sleep in a nest . . . all flannel and feathers tucked into an alcove. It is get-out-of-here comfortable, with fresh air head and foot.
Besides my large, regular down comforter I have a mini one, more like a down throw, that floats on top of it all. When everything is properly fluffed, the covers are 8″ to 10″ deep. I live in a microclimate with cool to cold nights year-round and no central heating so I’m always comfortable in this nest. Yum.
Feathers are lightweight, great insulators, and can be compressed into very small packages. They’ve been used for warmth for centuries by certain peoples, mostly northern Europeans. My Austro-Hungarian Grandma raised geese both to pluck for “feather ticks” and to eat, and Hungarian Goose Down is still considered some of the finest in the world.
Probably the most familiar use of feathers in the USA today [besides in pillows] is in down sleeping bags. They have all the right characteristics for adventurers: lightweight, warm, compressible.
Down items need to be washed sometimes and that scares the bejeezus out of most people, but I’m living proof that the process is easy and healthy and safe . . . if you do it right.
First of all, let me address “dry cleaning.” In the ways of the world this is a new process, only about 100 years old, and it uses chemical solvents. There are certain, tailored items, like suit jackets and slacks, that contain multiple types of fibers processed in different ways. If you were to wash them you could remove the additives that keep them “crisp” and might cause parts to shrink at different rates . . . in other words, you could ruin them.
However, there are many other items that you can wash. They have “dry clean only” labels because if you wash them the wrong way they’ll shrink or felt and the manufacturers don’t want the responsibility of teaching you how to do it right. Personally, I don’t want to wrap myself in chemical residue.
BUT ON TO CLEANING YOUR OWN FEATHERS . . .
Put your sleeping bag or mini-comforter or feather pillows into the washer. Add cold water and a little soap. I use whatever “eco-friendly” brand that was on sale at the co-op the last time I ran out and I use only a little. Use the “Delicate” setting.
When the washer has finished its job and buzzed at you, remove the items and put them into the dryer. Now this is where you have to pay attention. You need to add a couple of clean tennis balls or those dryer balls. You could use a new, unworn pair of tennis shoes too, but who has those? Run the dryer on air/fluff (i.e. no heat) for about 15 minutes, then switch to the coolest heat setting for 15 minutes. Continue to alternate between the two until your item feels dry.
I like to wash a down item on a sunny, windy day so that I can take it out of the dryer after an hour or so and hang it from a line or drape it over the porch railing. When the sun goes down I return it to dryer at the lightest heat setting until done.
I’m very fond of simple, creature comforts. I find settling into clean, fluffed bedding that smells of sun and wind to be luxurious . . . healthful . . . and downright delicious. Yum.
Arnica Montana . . . it belongs in your home
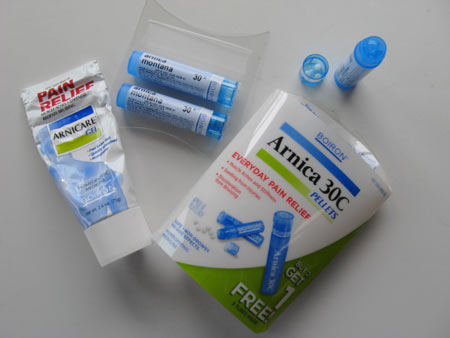
You need to keep these things with your first aid supplies:
The herb is Arnica Montana and you can buy it as a gel or cream. You can also buy it as little homeopathic pellets that you put under your tongue and let dissolve (those are in the little blue tubes). I use both the gel and the pellets.
The packaging says it’s for “Everyday Pain Relief” but it’s real magic is for bruises. The faster you apply it, the better it works.
I took a headlong spill a couple of weeks ago off my steps that ended with a dead cat bounce. I lay there a minute inventorying my body to see if I could feel if anything was broken. When I got up I immediately found the arnica gel and slathered it over all the parts that hurt and the bruises that were forming. I had run out of the pellets.
I was lucky. Just a cracked rib and a number of bruises. The rib is still reminding me to be careful where I put my feet but the bruises were gone within a few days.
Seriously! This stuff works! My bruises heal in miracle time if I find them right away and use both the gel and homeopathic pellets. I’ve even had a doctor and a physical therapist comment on how quickly they heal.
Of course . . . maybe you don’t need Arnica at all because maybe you aren’t as clumsy as some people.
Yogurt and Garlic Pasta
I took a 5-day gallivanting road trip a couple of weeks ago to play with old friends and knitting.
Before I left I cleaned out the refrigerator. The day after I got home I needed to hustle up a pot-luck dish to take to Blessings and I’m tired of driving so I looked at what I had on hand. This is a major theme in my food world. I ALMOST NEVER, EVER, SHOP FOR THE INGREDIENTS FOR A RECIPE. Instead, I keep things around that I know I like and ‘cook’ from those. I shop my cupboards far more often than shopping at the store. This saves me time and money, especially because when I cruise the grocery store I buy what’s on sale if it’s one of my staples.
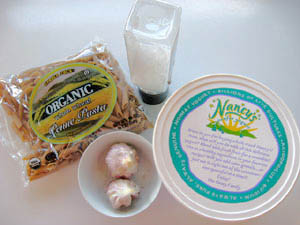
I found four things I almost always have in the larder:
yogurt, salt, garlic, and pasta. The pasta is Trader Joe’s Organic Whole Wheat Penne, but you can use any type. The yogurt is plain Nancy’s Nonfat. Plain is important.
Next I got out my mortar and pestle and pulled some cloves from the garlic. A lot of cloves.
In my neighborhood garlic is planted in late fall and harvested mid-summer. That means that by late spring, most garlic has lost some of its flavor, and is softish. This garlic is a freshly harvested, very pungent rojo (red) variety. Small cloves but full of oil and hot stuff. Perfect for this dish.
Lay them on the cutting board along with your biggest and heaviest knife. Mine was hand made from an old saw blade and its blade is 8.5″ long. 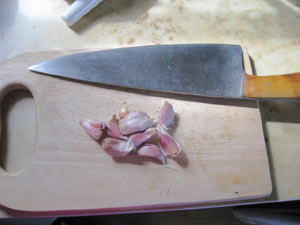 I lay it flat in on top of the garlic cloves and give the blade a thwack or two with base of my palm. This breaks the outer skins and makes the cloves easy to peel.
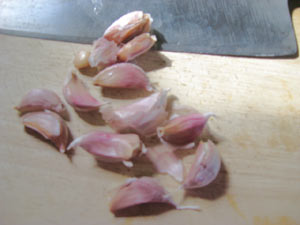
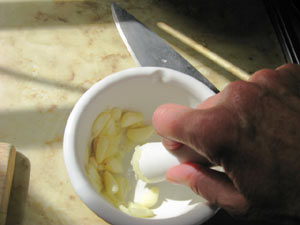
My mortar and pestle are not perfect for this job. They’re unglazed porcelain. They don’t have much bite for grinding anything other than dried herbs, but I use them anyway because they are what I have. I add the garlic cloves and some coarse sea salt and grind the heck out of them.
Now is the point at which enquiring minds will ask, “Why is she grinding the garlic rather than chopping or mincing it? ” And the answer is I want to smash the oil out of it, which gives it a stronger flavor. That and the oil mixes readily with the yogurt. You could also use a garlic press which crushes the cloves. You could also use a wooden spoon in a bowl, two wooden spoons nestled together, two forks and a plate . . . invent a technique using the tools you have on hand. I use this technique because this is how I learned it from a Greek lady.
Next, I put a large dollop of yogurt into a bowl, about a cup-and-a-half to two cups, [here’s another theme: I SELDOM MEASURE INGREDIENTS] and add the garlic-salt mixture: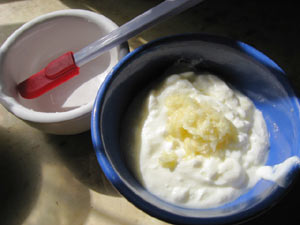 Then mix it all together with a fork or spoon or rubber spatula (or I suppose you could use your finger but it would be messy).
Next, cook your pasta per instructions on the package except you don’t need as much water as they say. I cooked the whole pound in my four liter pot a little over half-filled with water. That’s just over half the water they call for. Just pay attention and keep the lid ajar.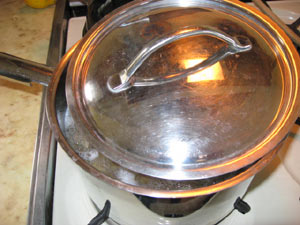 Now if I had had company here for dinner, the table would have been set, the lettuces salad made but not dressed until the last minute, and I would have combined the pasta with the yogurt sauce and served it. It would be time to eat immediately after the pasta was drained.
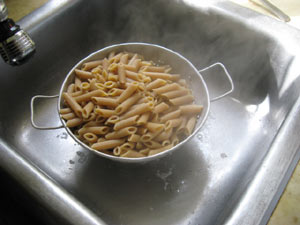
As it was, I was going to a pot luck and a Blessings sister had called an hour earlier to sing ‘Happy Birthday’ and she told me she was bringing fresh basil pesto. We decided it would be nice on the pasta as well, so I dished it out like this: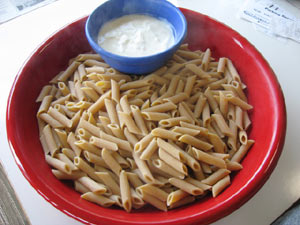
I had to drive about 20 minutes and we ate another half-hour after that but I didn’t worry. This dish does fine at room temperature.
LEARNING OPPORTUNITIES:
- Unless the Fourth Hungarian Regiment is coming for dinner, don’t cook a whole pound of penne. It makes A LOT. I made 3 to 4 times more pasta than we ate. There was a pasta salad there (which doesn’t happen too often. We never plan who’s bringing what. We all just make what we feel like making that day) and lots of other goodies including a to-die-for-from-scratch-chocolate-birthday-cake. Even after I gave away some of it, I brought over a quart home.
- Don’t mix the sauce with the pasta until you’re ready to serve it, otherwise it gets absorbed by the pasta which becomes bloated (i.e. no longer al dente) and starchy. Eeewwww. I learned this years ago but it’s relevant here.
- Can you freeze cooked pasta? None of us knew so I came home and promptly put a quart of it into a yogurt container and popped it into the freezer. I’ll let you know the results when I take it out.
- This sauce, with much less yogurt, is great medicine for a sinus infection or cold. It’s hotter than heck but safer for you, and for me more effective than, antibiotics. Serve it on crackers, hold your nose and dive in. Good (organic), fresh garlic is good medicine. I know this because my great-grandmother (and generations of my ancestors before her) was the village healer. Modern medical research is finally catching up.
p.s. It was a hit. I’d never taken it to Blessings before and most of the sisters loved it. A couple kept remarking that they never would have thought such an odd combination could be so good. That’s only because they haven’t hung out with the right old Greek ladies.

