Hungarian Irene’s gulyás

* Irene and my favorite brother-in-law escaped together from Hungary by jumping into a cold, dark river and swimming, at night, to Austria. In the 50s. Those were harsh times and we’re glad they were able to join us here.

I originally copied down her oral recipe on a brown paper bag while we were on the ferry to Victoria B.C. Here’s my typed interpretation of my scribbled notes. I wrote this for my nephew when Irene died. A little remembrance.

~Brown onions, lots of onion
~add just beef or lamb, stew-chunk size, turn the meat in the oily onion [this presupposes that you know you have to brown the onion in fat . . . preferably bacon fat if you have it on hand but olive oil will do for us moderns]
~Irene didn’t mention it here, but WHEN THE MEAT IS BROWNED, here is when you add lots of paprika . . . lots, like a couple of tablespoons full but stir like crazy because you want it to be barely sauteed with the beef and onions but you don’t want it to scorch. I’d say only one minute before you add . . .
~add some water. Not a whole bunch, not too little. Be like Goldilocks here. Add just the right amount. Think twice the height of the meat. But make sure the meat is brown before you add the water.
~Simmer this. Cook the meat until it’s almost tender (depends on the cut of meat how long this will take) and add salt toward the end.
~Now to add the veggies: potatoes, carrots, celery (all chopped), a bit of caraway seed [1 to 2 teaspoons . . . don’t go crazy with it] and simmer some more until they’re all tender.

Now for the noodle/dumpling parts. They are very important because they make this dish authentic and they thicken it.
~Mix flour, salt and water by hand into a hard dough. [I learned to do this is as a child in my grandmother’s kitchen so it’s kind of hard to explain in words. It’s best explained through fingers but try this: make a pile of flour on the counter . . . about 2 cups worth. Keep it tallish. Add 1 tsp of salt and mix the two together with your hand. Then make a little hole in the top of the pile and start adding water . . . say 1/2 a cup. Work it in, then keep adding water, a little at a time, until you have a stiff dough. Meanwhile, keep the pot simmering. When the dough is sticking together, has some integrity, start pinching off LITTLE pieces and dropping them into the simmering pot. When they are cooked, the gulyás is done.

** Two notes. 1) My grandma made her noodle-dumplings with an egg added to the water and 2) Real Hungarian paprika comes in all levels of hotness so you can choose to vary that level of picante for yourself. But it really does need to be Hungarian paprika, not Spanish or Korean.

Island Blackberry Cobbler

Quick! Cobbler Time! The blackberries are early this year and here’s an easy-peasy recipe that will impress even that snooty co-worker of yours. Any fruit will do and cobblers are a heck of a lot easier than pies in my book.
 p.s. If you serve your warm fruit cobbler with vanilla ice cream you get extra warm-and-fuzzy-food-memory points with your children and their children, and their children . . . in perpetuity.

Cheryl’s Island Blackberry Cobbler

A simple holiday season and Pumpkin Bread. . .

My “Holidays” are the simplest of any I know. I made that choice 40 or so years ago. It suits me and I want to share what that looks like.

Because I come from a Catholic tradition, my celebration for this time of year is, basically, Christmas. But I resonate with the Solstice, so I celebrate both in quiet ceremonies at home. In the afternoon and evening I gather with family and friends. I adapt to the people around me and my geographical location at the moment, but simplicity is key.

I have one child. I collect things during the year that I think would make his life more wonderful. He is the only person on “my list” so anyone and anything beyond that is optional. Don’t get me wrong. I love giving and getting meaningful gifts . . . but “meaningful” is the operative word here. Everyone I know has more stuff than they want or need. I don’t feel obligated to contribute to their burden of stuff to take care of . . .  but if there is something I can give that is thoughtful and heartfelt and needed? . . . I’m all over it, though I usually deliver at any time during the year, when it’s really needed.

I do, however, have one little gift tradition . . . I make Chocolate Chip Pumpkin Bread for selected friends, family and acquaintances. It’s a tradition that started in the early 1970s with my next-door neighbor, Mrs. Shubel.

She was in her 80s and lived to the north of the first house I bought with my first husband.

first-house-2
My First House as a Grown Up

Mrs. Shubel taught me many things, but only two of them were life-changing:

  1. It’s a worthy thing to have a large, spectacular garden populated with one type of plant that blooms only 3 weeks a year (in her case it was bearded iris).
  2. It’s important to have a really good Holiday recipe to give as your signature gift.

Mrs. Shubel’s recipe was her Pumpkin Bread. She put dates in it and baked it in one-pound coffee cans. You couldn’t miss it. Who else delivered aromatic cylinders as presents?

But I don’t drink coffee that comes in cans and I’ve had years to play with her recipe. My adaptations settled in about 35 years ago to create my Signature Holiday Gift. I traded chocolate chips for dates and baked it in regular pans. And now I gift it to you. Put your name on it and call it your specialty. Use it to simplify your life . . .

MRS. SHUBEL’S  and CHERYL’S HOLIDAY PUMPKIN BREAD waiting for your signature. . .

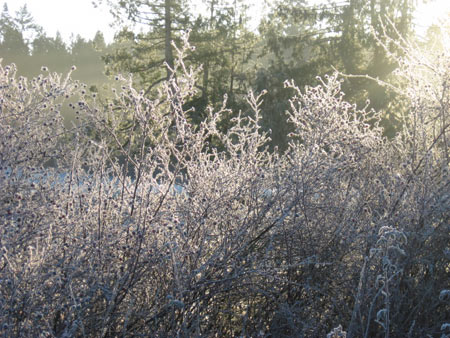
First . . . it needs to be very cold and beautiful outside . . .
Christmas-Eve-Morn

Well . . . that’s not true . . . but this was the view the morning I started baking my 2009 Christmas bread. The winter sun here is rare and thus precious. I enjoy it at any . . . and every . . . opportunity.

Next, read or reread my earlier post about the basics of making any cake (or, in this case, a sweet bread which is the same process): The Zucchinis are Coming . . . Let them be Cake.

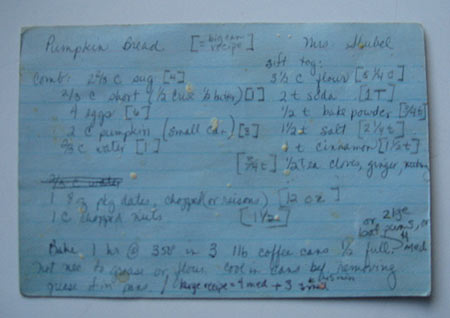
Then get out the recipe:Pumpkin-Bread-Recipe

The original recipe called for a small can of pumpkin which was about 2 cups at the time. Long ago I upped the recipe so that I could bake more at once and I use the larger can of pumpkin. I will give you both sets of numbers. The numbers in the brackets refer to the more ambitious amount.

DRY INGREDIENTS:

  • 3½ C flour [5¼ C]
  • 2 t baking soda [1 T]
  • ½ t baking powder [¾ t]
  • 1½ t salt [2¼ t]
  • 1 t cinnamon [1½ t]
  • ½ t [¾ t] each of ground cloves, ginger and nutmeg

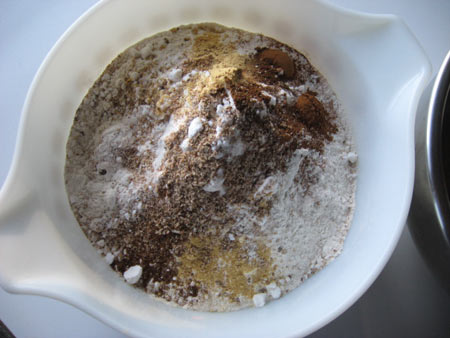
Put all of these into a bowl

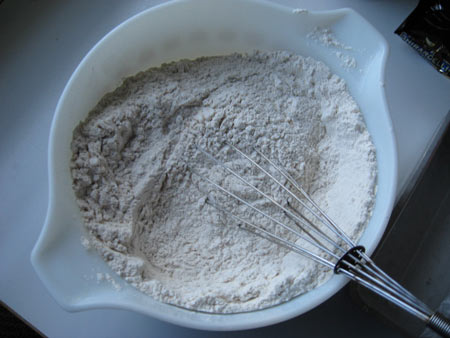
PB-dry-ingredand then gently whisk them together.

PB-dry-mixed-ingred

THE WET INGREDIENTS:

  • 2 C pumpkin (small can) [3 C] (most of a large can)
  • ⅔ C water [1 C]

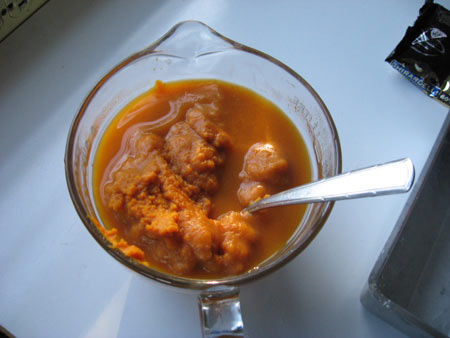
Combine these in a separate bowl.

Pumpkin & Water

THE CREAM-TOGETHER INGREDIENTS:

  • 2 ⅔ C sugar [4 C]
  • ⅔ C butter [1 C]
  • 4 eggs [6 eggs]

THE CHUNKY ADDITIONS:

  • 1 C of  chopped dates OR raisins OR chocolate chips [1½ C]
  • 1 C of chopped walnuts [1½ C]

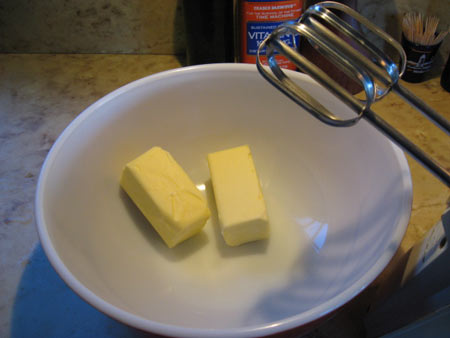
Start by beating the “cream-together” ingredients with an electric hand or stand mixer. You could even use a wooden spoon if that’s all you had but it’s a lot of work. Soften the butter first. It sat out at room temperature over night (but the room was pretty chilly).

Butter

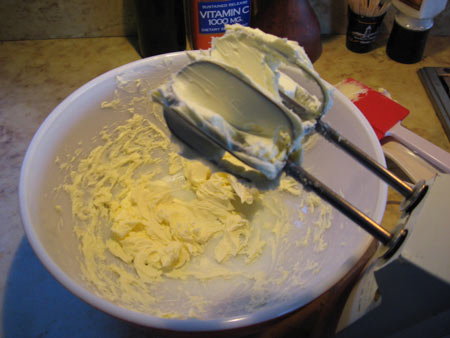
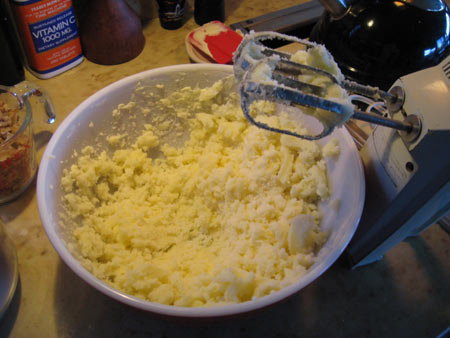
Notice how it gets lighter in color as you incorporate air.Creamed-butter

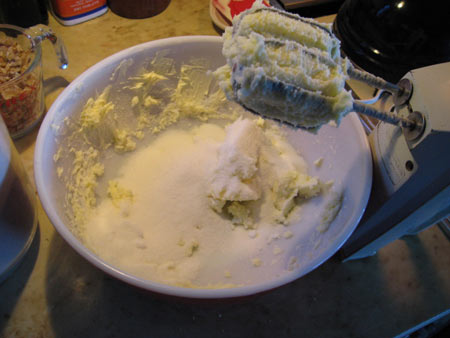
Once it’s fluffy start adding the sugar about a cup at a time.Add-sugarand beat after each addition to incorporate the sugar evenly.Beat-in-sugar

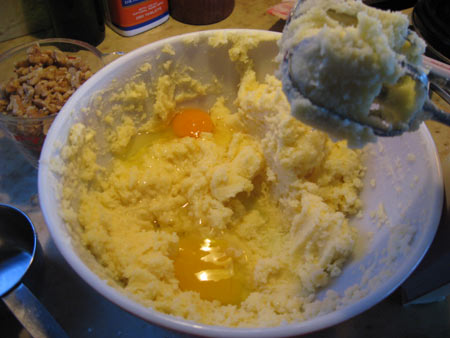
Once the sugar is all in you can add the eggs, 2 at a time, and beat after each addition:Add-eggs (Notice the bright orange yoke versus the lighter yellow yolk of the larger egg in front. The bright orange yolk is from my friend’s chicken, the lighter one is store-bought.)
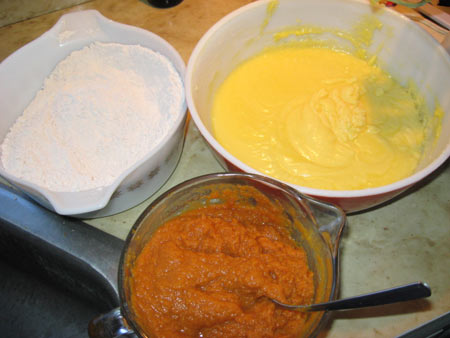
And now you have 3 bowls of ingredients: dry, wet and creamed.

Three-bowls

Some important notes here.

  1. Once you combine the baking soda and powder with liquid, you’re starting the chemical reaction that makes bubbles so you need to get it into a preheated oven (350º) in a hurry. That means your pans should already be prepared.
  2. When you were working with the butter, sugar and eggs, you beat the heck out of it to incorporate air. Now, you are going to stir gently . . . just enough to mix everything evenly. If you beat it, it will develop the gluten in the flour and it will be tough. That’s why we knead bread . . . to give it that chewy texture. However, you want your cakes and sweet breads to be tender and a little crumbly.

Let me back up a little here. My actual order of doing things is this:

  1. The night before baking I assemble the dry ingredients and take the butter and eggs out of the refrigerator and let them come to room temperature overnight.
  2. At baking time, before I start the mixing process I prepare the pans and turn on the oven.

THE BAKING PANS

Mrs. Shubel’s original recipe calls for 3 one-pound coffee cans half filled and baked at 350º for one hour. These are my adaptations:

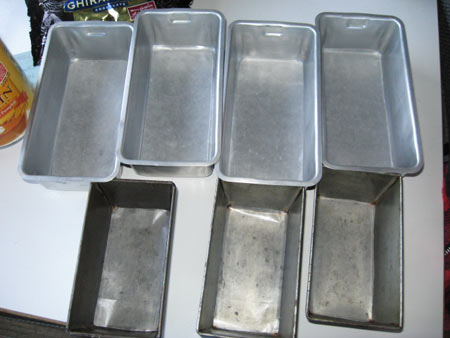
Smaller recipe: 2 standard loaf pans (9″ x 5″ x 2¾”) OR 4 medium loaf pans (7½” x 3¾” x 2¼”) OR  one standard pan and 2 mediums.

Larger recipe: This is how I usually do it. I use my 4 medium pans plus 3 smaller ones (5½” x 3″ x 2″).

I’m trying to make this simple and I realize that not everyone has 4 sizes of loaf pans on hand, but this is the best I can do with honesty. If you are a novice baker and you like things like zucchini, pumpkin and banana bread, you need 2 standard loaf pans. That’s how I started. These kinds of breads freeze very well and it takes just as much effort to make one loaf as two, so make at least 2 at a time.

Regardless of the size of the  pans, this is how you prepare them.

  1. Grease them with Crisco or butter. That means to take a piece of paper towel or waxed paper, grab a small clump of solid fat with it and rub all the interior surfaces of the pans.
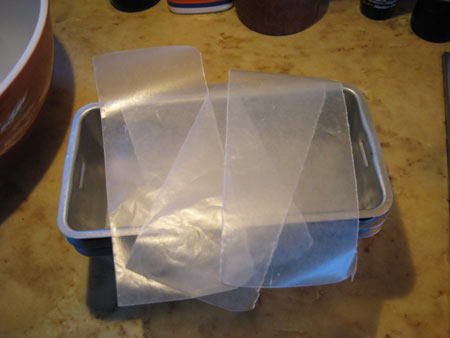
  2. Cut pieces of waxed paper (or baking parchment) the size of the bottoms of the pans.Waxed-paper-bottoms
  3. Once the pans are greased the paper clings easily to them.

Prepared-Pans4. How long you bake them depends on the size of your pans and your oven but I find that these pans need about 45 minutes of baking. You might need to take the smaller ones out of the oven earlier. Just keep testing by inserting a toothpick into the center of the loaf. If it comes out clean and not with goopy batter on it, they’re done.

Easy cake baking

An introduction to cakes

Cakes are easy to make. Recipes . . . not always easy to read, especially when you’re juggling a spatula, wooden spoon, hand mixer and 4 eggs. Thus, many years ago I streamlined the process of cake baking by thinking about it differently. I know this is a long explanation, but once you have the process down, you can make a cake about 3 times faster than if you laboriously follow most recipes.

You have basically 3, maybe 4, categories that go into a cake:

  1. A bowl of dry ingredients.
  2. A bowl with the fat (butter or oil), sugar and eggs that you “cream together.”
  3. A liquid of some sort, usually not much, so you can put it in a measuring cup. (I use a one or two cup liquid measuring cup.)
  4. You might have some solid things like nuts to add at the end.

When I lived with “the guys” (a couple of husbands and a son, not all at the same time) I baked lots of cakes. This was my procedure which I encourage you to try:

  1. The night before I was going to bake I’d put the dry ingredients into a two to three quart bowl. For almost every cake, these are the same: flour+salt+baking soda and/or baking powder. A few other powders that might be included are unsweetened cocoa for a chocolate cake and some spices like cinnamon and cloves for a pumpkin or carrot cake. Take a fork or a whisk and gently stir them together so that everything is evenly distributed. Be gentle but thorough. Always put love into your food during the preparation.
  2. Put the butter in a slightly larger bowl. I leave it in its wrapping until it’s time to “cream” it.
  3. Set out the number of eggs you’ll need. Put them in a bowl on the counter so that one doesn’t roll off and splat on the floor.
  4. Measure out the “wet” ingredients in a cup. It’s usually milk or buttermilk, occasionally water.
  5. Go to bed and get a good night’s rest. Your ingredients are adjusting to room temperature in preparation for their willing sacrifice to your palate.

Show Time!

The above part of the  preparation was the Zen part of cake-baking, but when it’s time to put it all together you need to get on with it. Making a cake is an exercise in chemistry and once you start the next part of the process you need to move faster.

  1. Grease the pan(s) and turn on the oven, usually to 350º.
  2. Cream the butter. That means beat the heck out of it with an electric hand mixer (my tool of choice), full-sized mixer or wooden spoon. Using a spoon takes a lot of time and considerable arm strength, but I’ve done it. You’re getting the butter soft and incorporating air into it.
  3. Add the sugar a little at a time (about 4 or 5 different additions) to the butter and keep beating it. You’re fluffing it up some more.
  4. Add the eggs, one at a time, and beat after each addition. If the recipe calls for vanilla or some other extract add it somewhere along in here.

Actually, you don’t have to hurry this creaming part. And this is the last time you’re allowed to “beat” anything vigorously. The reason is this: you don’t want your cakes to be tough. When you bake bread you knead the dough for a long time. This heavy treatment develops the gluten in the flour and that’s what gives bread it’s chewiness. It also helps to develop those good-sized holes.

Cakes are meant to be tender and you want to treat the addition of the flour mixture more gently because you don’t want to develop the gluten.

You now have five additions to make to your creamed mixture. After each one you will stir/beat the ingredients just until they’re incorporated (i.e. you can’t see any more powdery stuff or loose liquid). They are:

  1. 1/3 of the dry ingredients
  2. 1/2 of the liquid ingredients
  3. 1/3 of the dry ingredients
  4. 1/2 (the rest of) the liquid
  5. 1/3 (the rest of) the dry ingredients

You don’t have to measure these exactly. Just eyeball them. And because now you’ve combined the baking powder and or baking soda with the liquid which often is acidic, you have a chemical reaction going on. The bubbles are starting to form and you want to get it in the oven soon.

Your last addition is any nuts, raisins, chocolate chips or other tasty morsels. Fold them in gently, trying to get them pretty evenly distributed but precision is not necessary for deliciousness.

Put the batter in the pan(s) and place the pan(s) in the oven and don’t you dare open that oven until more than half of suggested baking time has elapsed or even longer. Otherwise your cake might “fall.”

A few more miscellaneous details . . .

  1. Don’t do the jig in front of the oven or drop heavy things on it or jostle the cake while it’s baking. Otherwise, your cake might fall (see above).
  2. When making a cake, measure your ingredients carefully. This is probably the only circumstance in which I do this because it’s chemistry (and alchemy but we won’t go there).
  3. If I use a 13″ x 9″ pan and I’m going to leave the cake in the pan after it’s cooled and cut the pieces out of there, I just grease the pan. If I use a pan (or pans) and want to take the cake out after about ten minutes of cooling, I grease the pans and then line the bottom with parchment paper I’ve cut to size. Waxed paper will do.

Something for you to practice on: Marilyn’s Chocolate Zucchini Cake

It occurred to me that since the zucchinis are starting their annual invasion of  the northern hemisphere, you might enjoy having this recipe. Australian and South African readers can bookmark this for the time when the invading hordes migrate their way. This does have an extra little step in there with the melting of the chocolate at the beginning, but it’s just one more skill.

Oh so moist. Not very sweet but definitely a heavy chocolate hit. And, of course, sinlessly good for you because of the zucchini.

Before you even turn on the oven or grease the pans, melt together in a small bowl in the microwave:

4 oz unsweetened chocolate
1/2 cup of neutral-tasting oil like canola

Be careful. Do it in one minute or less intervals and stir it in between them. The oil heats up quickly and the chocolate squares will continue to melt as you stir. You don’t want to scorch it. You will add this to the creamed ingredients after all the eggs are beaten in. Let this cool down before you add it to the fat ingredients because you do not want to melt your butter or cook your eggs!

The dry stuff:
1 Cup flour
1/3 C unsweetened cocoa
2 t baking soda
2 t baking powder
1 t salt

The wet stuff:
1/3 C buttermilk or sour cream (if you don’t have them on hand you can use regular milk (any % fat or nonfat) with a teaspoon of lemon juice or vinegar added to it)

The cream together stuff:
1/2 C butter
2 C sugar (regular granulated)
3 eggs
1 T vanilla
[and your cooled chocolate/oil mixture]

Fold in gently at at the end ingredients:
3 C grated zucchini or summer squash
1/2 to 1 C chopped walnuts

This is thicker than most cake batters but don’t worry.

Easiest is to bake it in a 13″ x 9″ pan for about an hour or until it tests “done.” That’s when the edges are starting to come away from the pan and when you stick a toothpick into the middle of the cake, it comes out clean. If it’s not done it will come out with sticky batter on it. If you use smaller pans, like two 9″ round cake pans, you bake it for less time, like 40 minutes or so.

When it’s cool frost with Cream Cheese Frosting  or any other favorite of yours.

Cream together 8 oz cream cheese and ½ cup soft butter (I prefer unsalted).  Add 2 t of vanilla. Slowly add about 4 cups of confectioner’s sugar, beating with an electric mixer after each addition. (I usually don’t measure. Just keep adding sugar until it’s the right consistency and taste.)

A Disclaimer

Except for eighth grade Home Economics with Mrs. Blair I never studied cooking in a school. Instead, I learned to prepare food from a gaggle of mentors (mostly Ma, Grandma and Great Aunt Shirley) and by doing it. So be forewarned. I may not explain things in the “right” way, but

  1. I make food that people like to eat. Lots of it. Lots of them. For lots of years.
  2. No one has ever gotten sick from eating something from my kitchen. At least they haven’t told me about it if they have. Or maybe they haven’t lived to tell about it, but it’s likely I would have noticed their obituaries.


Homemade Cream of Tomato Soup

My son recently moved to Cambridge to be with his Beloved who is finishing up her degree in architecture at MIT. They shop at the Haymarket where they get great bargains on produce. One of this week’s steals was 15 POUNDS OF TOMATOES FOR $2.

When I heard that, I emailed him:

“Sounds like Cream of Tomato Soup time. My grandma used to make it. Onions, garlic, tomatoes (she removed the skins first. It’s easy to do. Get a small pot of water boiling. Drop the tomatoes in and remove them in about 30 to 40 seconds and put into a colander in the sink. The skins should split and peel right off. If not, add 10 second increments to the immersion time.)

Saute the onions and garlic first. Add the tomatoes and cook them slowly (like a simmer) until they break down and are very soft. At this point you can puree the soup with a blender. My preference would be to puree about 3/4 of it. That would leave some texture. Return to pot, and add milk. We used cow’s milk and I don’t know the best vegan alternative yet. Rice milk? Soy milk? Heat gently (don’t bring to a boil) and serve.

[I just Googled vegan cream of tomato soup. One recipe uses unsweetened soy yogurt and another uses chunks of Italian bread, (like Italian Bread Soup). The bread one I know works well and tastes great.]

Somewhere in there add salt and pepper to taste and maybe some herbs if you’re inclined. Basil and/or oregano might be nice. Thyme for a different take on things. And I rather like parsley with tomatoes.

Haymarket sounds incredible. I love how you guys do things. We gain so much freedom by being thoughtful with our money.”

He made it that night and their response? : “MAN that soup was good.” I thought you might enjoy it as well.

Of course, they had grilled cheese sandwiches with it. One of icy winter’s favorite comfort meals.

You can use good canned diced or whole tomatoes if you don’t have fresh, but be careful. Once you try this you may never open a can of tomato soup again.

Lactose intolerance

Sexy title for a blog post, no?

In 1971 I taught at the Seoul American Middle School on the military base in Seoul, Korea. It was during the Viet Nam war. My students were, as a group, the most physically beautiful humans I’ve ever been among, mostly because many of them were ethnically mixed. A large number were Korean-American. Their mothers were Korean, their fathers American, most Caucasian, some African-American.

Many of their fathers were in Viet Nam and the children stayed in Seoul, living with and in their Korean families. And this caused a problem in the classroom.

My students who were of European descent complained that the Korean-American students smelled of garlic. My Korean-American students complained that those of European descent smelled like sour milk.

We talked about it and decided, in a respectful way, that they could sit on opposite sides of the room, but there was to be no name-calling or complaints and when we did a project that involved mingling, they would simply have to deal with it.

Just this morning I ran across this in a report from the Food Empowerment Project:

“According to the U. S. Department of Health and Human Services, ‘The pattern of primary lactose intolerance appears to have a genetic component, and specific populations show high levels of intolerance, including approximately: 95 percent of Asians, 60 percent to 80 percent of African Americans and Ashkenazi Jews, 80 percent to 100 percent of American Indians, and 50 percent to 80 percent of Hispanics. Lactose intolerance is least common among people of northern European origin, who have a lactose intolerance prevalence of only about 2 percent.'”

Even though I have northern European background, I haven’t drunk cow’s milk in years. I don’t particularly like it and ever since the advent of  rBST, I’m careful to choose dairy products from animals that haven’t been treated with it.

There is a lot of  energy going into improving the food we feed to our children at schools. Milk is a major staple of  the National School Lunch program. Here we have an opportunity to change public policy based on research. What a novel idea!

The larder . . . don’t make a home without it . . .

So what’s a larder, you ask? A place where you store foodstuffs. A foodstuff? An ingredient that you eat alone or combine with other things to create a “dish”  or a meal:  “any material, substance, etc., that can be used as food.”

Another word for larder is pantry. It’s the place where you store the things you need to make real (or unreal) food.

Back in the olden days, before my time and refrigeration and easy transit, larders were magical. My second-to-the-last father-in-law, who died many years ago, told me about taking the steamer boat from Long Beach to Seattle with his mother to spend the summers at her childhood home. They’d pick up a well-cured ham and other provisions in Seattle before the day-long trip back to the island. The ham would hang for most of the summer in the “cool-space” on the north side of the house and they would cut chunks off of it all summer for hearty country breakfasts. (The cool-space is still there in the old house.)

So a larder/pantry is the place in your home here you store food. It can be a basement, a shed, an extra freezer, a designated pantry space, a breezeway or “cool porch.” It needs to stay as cool as possible in temperature without freezing.

I grew up in a family that stored a lot of food. In fact, they spent most of the harvest season (July through October) doing just that . . . “putting up” food. Many things scared me in my young life, and still do today, but going hungry is not one of them. My childhood house had a special basement room designed to store hundreds of jars of canned goods, big bags of flour and salt, and it had a huge deep freezer.

Here’s an example of how extreme we were . . . and I am . . .

My childless and widowed Aunt Mary dropped dead one Sunday morning in late August, 1975. She was 60 years old, walking home across a field from her sisters-in law’s house and she was canning a kettle of beets at the time. She had spent weeks canning all the tomatoes she could handle and they were still coming on so she had called me and invited me to come pick the rest.

I said yes and was scheduled to be there at noon or so. At around 10:30 a.m. my mother called me.

“Hi. Have you talked to Mary?”

“Yah. I’m heading out there to pick tomatoes at noon. Gonna can some juice and chili sauce too.”

“I just got a call. She’s dead. She dropped dead walking home from the sisters. She had beets on the stove. They turned ’em off.”

“I can’t believe it! . . .”  . . . and then we hung up, both of us in shock. When you’re in shock, you act like everything is normal when, in fact,  the whole earth under you has just broken apart. Reality has shifted and everything you thought was normal and all you take comfort in falls into a chasm . . . but you somehow maintain the veneer of normalcy.

Less than an hour later, I was sitting there, crying and thinking and it was clear . . .  “I need to go pick those tomatoes. They can’t go to waste.” So that’s what I did. For several weeks. I picked and canned whole tomatoes, tomato juice and chili sauce (which no one else in the family had ever tried.) My teenaged nephew joined me to pick and can one whole weekend. We also picked the green beans (froze them) and beets from her garden . . .

Dying is no excuse for not harvesting and “putting up” a good garden.

White bread

I never did finish my stories about white bread  . . .

Already you know that I buy it only to make dressing at Thanksgiving. Sometimes I make dressing at other times of the year if my nephew (who is in the Navy and not always here for holidays) is in town, just because he likes it a LOT. I ask for turkey backs and necks at my local grocery (they don’t often have them) and freeze them so that I have them on hand for a dressing emergency. Only occasionally can I find giblets, and I freeze them as well to add to the mix.

But I have other experiences with white bread.

White Bread Story #1

The first one involves my Grandma. She went through a stage about 10 years before she died that can only be described as “vivid.” This was in the late 60s and early 70s and hot pink, lime green and tangerine orange were . . . well . . . available. Grandma started crocheting afghans that were loud enough to keep you awake at night. It turned out it was her cataracts. As things grew dim through her eyes she sought out the colors she could see. She had created artistic things all her life. . . the queen of craftdom . . . and she liked color. But now she could see only the neon varieties which I’m guessing looked like tasteful pastels to her.

During this period she discovered a new craft  . . . White Bread Clay. She mixed half and half water and Elmer’s Glue and kneaded it with white bread (crusts removed) and some food coloring . . . that would be my mother’s professional cake-decorator colors that knocked your socks off if you weren’t careful.

Grandma patiently kneaded the mixture into a fine sculpting medium. It was the precurser of Sculpey it was so smooth . . . and she sculpted flowers. Small, delicate, one-petal-at-a-time, perfectly formed roses and tulips and zinnias . . .  that looked like they came from Mars because surely the flowers are brighter there.

Once she had her cataract operation her creations settled back into colors that were more “acceptable.”  I missed her color flamboyance, but her gifts started to match my decor better.

White Bread Story #2

When my son was about 4 years old, new people bought the property next door and they had 2 children only slightly older than he. This was a huge boon . . . to have kids “next door” to play with at any time.

One day he came running home, excited to no end . . . “Momma!!!! They have the best sandwiches there!!! You can squoosh’em down to real skinny. Just push on’em and they get flat.” Beloved Son had met white bread in its native form for the first time.

[Side note: Beloved Son also met Kool-aid at this house. This family had plenty of money to buy real food and mom was home all the time. They only lived next to us 4 or 5 years and both children broke bones while they were there from small falls. Beloved son fell out of trees and tumbled 360º off his moving ATV (All-Terrain-Vehicle, his father’s idea when he was 10) and had bruises only.  Good nutrition makes a difference,]

White Bread Story #3

From 1990 until 1998, every winter but one, we went to Baja California and other southern places for 2 to 4 months in the winter. We had a 20-foot 1970-something Minnie Winnie motor home. It had high clearance and took us to remote outposts. This was when Cabo San Lucas was a sleepy fishing village . . . no luxury hotels, free camping on the beach. Large (6″5″) husband, large dog (German/Australian Shepherd mix), me and Beloved Son. We had some adventures, I tell you, with hurricanes and washed out roads . . . but that’s a story for another day.

Remember I said that Ma’s Thanksgiving dressing takes about 1 and a half loaves of bread. I usually cheat and use one loaf of white bread and make up the rest with the good stuff . . . the real staff of life . . . but one of those years, along about 1993 or 4 I bought 2 loaves of white bread for Thanksgiving dressing. I used the requisite one-and-a-half-loaves and that left one-half loaf that I put on top of the refrigerator and forgot.

We took off shortly after Thanksgiving that year and returned 4 months later. The bread was still on top of the refrigerator. Now . . . granted . . . it was winter and cold in the house while we were gone. But it didn’t freeze. And the sun came in to warm things up on some days . . .

I saw the bread and said, “Geeze! I forgot and left this bread out.”  (I hate to waste anything.)

It was in its original plastic bag packaging. I opened it up and called Beloved Son to witness what I had found . . . (Home-schooling Mom Syndrome. Everything is a teachable event.)

“Honey . . . look at this. This bread has been sitting here for 4 months and it has no mold. Mold is one of the lowest of life forms. If this stuff cannot support mold, it will not support your body.”

Except for dressing, Beloved Son does not eat White Bread.  Neither do I.

Wonder Bread and Ma’s Thanksgiving dressing

This week I want to talk about my experiences with store-bought white bread. First of all, we didn’t eat it in our house when I was growing up in the 1950s. My dad said that if you ate it it would make a dough ball in your stomach and gum up your whole system. It might even cause you to explode. We ate my Mom’s home-baked white bread and the local bakery’s pumpernickel and rye swirl.

My dad died in 1959 and that changed our diets considerably. We had much less money and Ma got to make what she darn well pleased and that included more gluten-rich Austro-Hungarian fare like chicken and dumplings . . . thus began the really good Thanksgiving dressing. Actually, I think this was always her dressing, even when Dad was alive but I only remember it as a pre-teen when I started to help her make it.

Ma’s Thanksgiving Dressing

The prelude to the holiday season in my house is the smell of white bread. It’s the only time of the year that I buy the stuff because it’s my job to make Ma’s dressing for Thanksgiving. If I don’t use the real (and, paradoxically, non-real) item the family will know and I will have failed my one puny job . . . so I do it.

I start a couple of days before the event by drying out the bread.

  1. Buy a loaf or two of white bread (it takes about 1.5 loaves, but I cheat by using one loaf and supplementing with real bread.)
  2. Dry out the bread. As in, get out as much moisture as you can without toasting or burning it. This is easy for me because I have a wood stove and I put the pieces on racks on the wood stove until they’re crispy but still white.
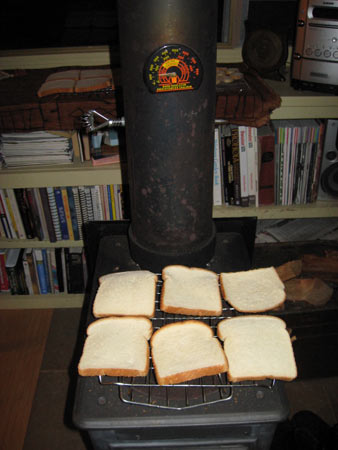
White-Bread-Drying

and here are my cheater breads . . . a nicely sliced baguette
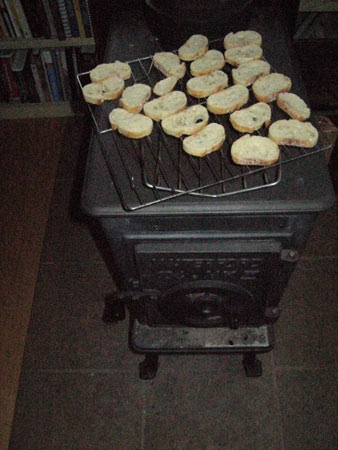
baguette drying

and one of my tokens to health in this recipe . . . a whole grain bread full of various seeds.
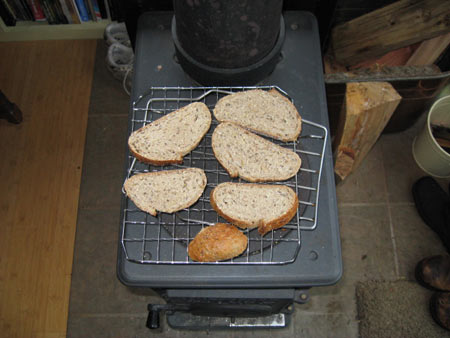
whole-grain-bread-drying

As the bread dries, crumple it into a BIG bowl and when it’s all there and the big day has arrived, get out the other ingredients: pork sausage, celery and two MAMMOTH onions (they were a over pound each).
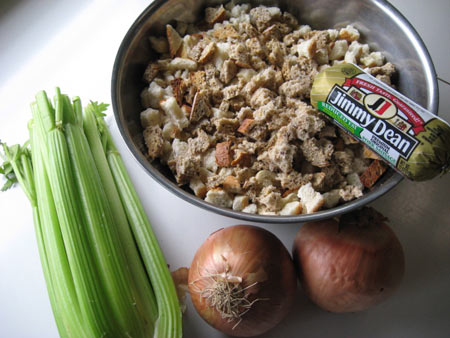
dressing-parts

Oh . . . I forgot to tell you. A couple of days before I made the dressing I cooked up a couple of turkey backs with some water, a little salt, a small onion, quartered, and some big celery chunks. I picked off the meat, discarded the bones and skin and “defatted” the broth by putting it in the fridge and lifting off the fat that floats to the top and becomes solid with the cold (there wasn’t much). I didn’t photograph this process. It wasn’t until the next day that I decided I might blog about it. By that time the process was done. Sorry. But here are the results:
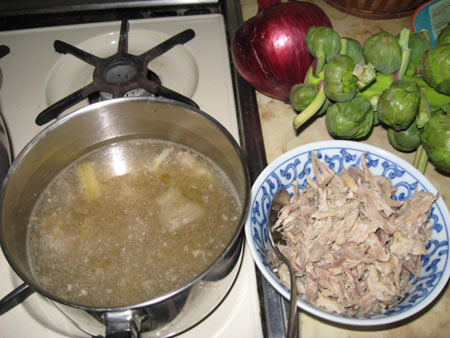
Turkey-broth+

The broth, of course,  is on the left. You can see big chunks of onion and celery in it. The little bits of turkey meat are on the right. My mom always used to say, “The meat’s sweeter close to the bone.” I think what she meant was that it was more flavorful, and that has been my experience.

But . . . to the process . . . and there is both nostalgia and practicality involved in this. My almost newest nephew is miles from me he will deep fry the turkey and I’m making the dressing . . . ergo WE DO NOT STUFF THE TURKEY.  It’s perfectly fine if you stuff your turkey but, contrary to popular belief, you don’t have to have a turkey to make stuffing. As in, you can make the dressing off site of the main event.

Starting over again at #1) get out The Dressing Pot . . .
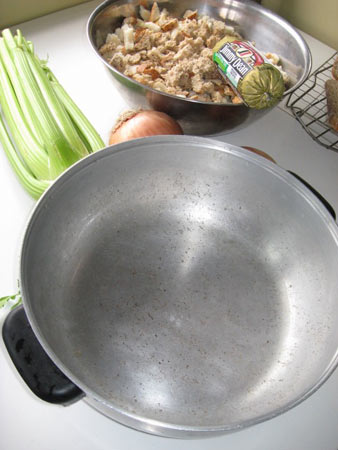
Dressing-Pot

It’s aluminum. It’s the only aluminum pot I own and the only time I use it is to make dressing at Thanksgiving. It was Ma’s and she used it to make dressing . . . what can I say? It’s big, can go into the oven, and I’m a sap for tradition.

2)  Put the pot on the stove, turn on the heat (mediumish) and add the pork sausage to the pot. Break it up into small pieces and stir it a lot. (I used my wood stove. It was hot-enough-to-cook-it, whatever temperature that was.)pork-sausage-first
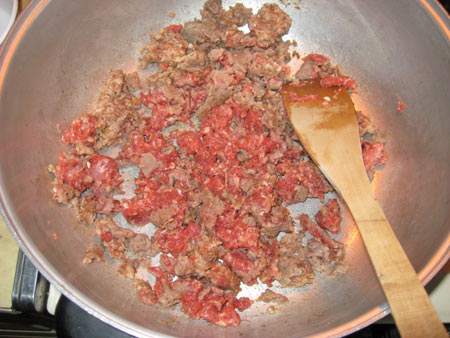
After it’s cooked through it looks like this:
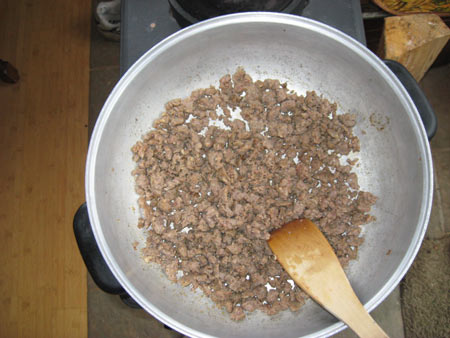
cooked-pork-sausage

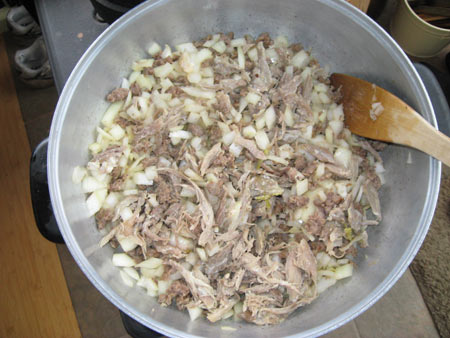
3) Add those 2 pounds or so of  yellow onions that you’ve chopped up. I leave the pieces pretty big.
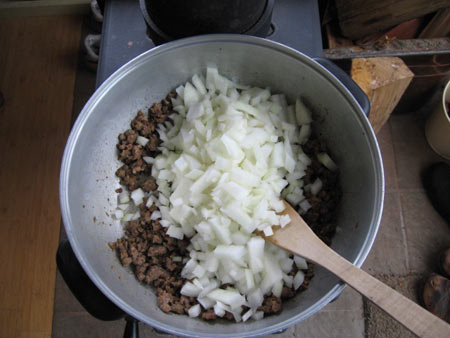
add-onions

and stir them around, cooking them until they’re softened. They look a little translucent.
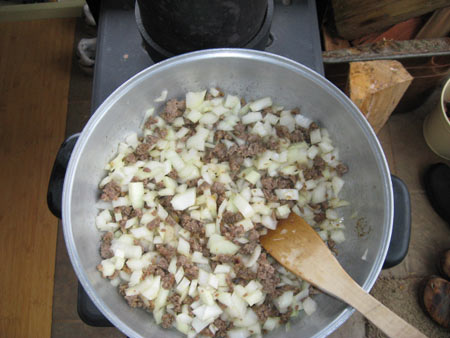
stir-in-onions

Next, I added the small turkey bits.

add-turkey-bits

I let those warm up while I chopped some celery . . .
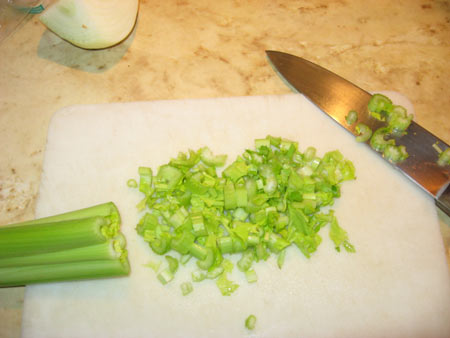
chop-celery

which I then added to the pot. I don’t cook it much at this point, just stir it well to distribute the ingredients evenly and then I remove the pot from the heat source.add-celery
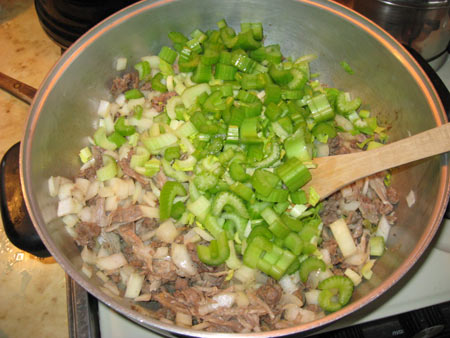
4) Next, I added the dried bread, mixed it up with the the other stuff, and poured the warm (not hot) broth over the whole shebang.
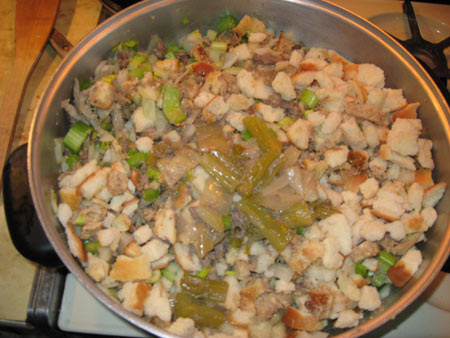
add-bread-and-broth

You can see the very cooked onion and celery that were in the broth. They’re soft and will disappear when you do the next step which is to mix it by hand . . . as in, you simply must put your hand in there and start kneading it together. Your broth can’t be too hot or else you’ll burn yourself.
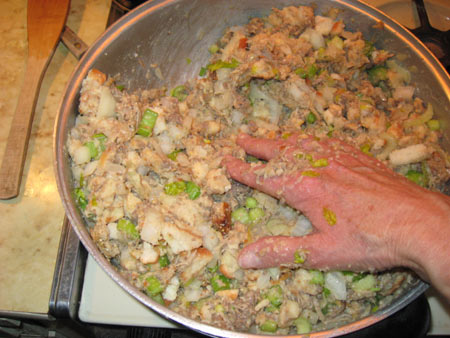
hand-mix

Now . . . every year, at this point in the process, I can hear Ma in my head . . . “You should do this the day before so that all the bread has a chance to absorb the moisture,” she says. And, of course, she’s right. But unlike her, I’m not always on top of the food-scheduling thing, and for the most part, my dressing is pretty good.

How much broth to add? Well, you want your dressing to be kind of gooey. It’s what Ma called “wet dressing.” It sticks together but it doesn’t have excess liquid. Therefore, I don’t add all the turkey broth at once. I add it as the bread absorbs it. It’s usually about a quart total. If you didn’t want to make your own broth you could add a quart of chicken broth.  This is a good brand I get at Costco:
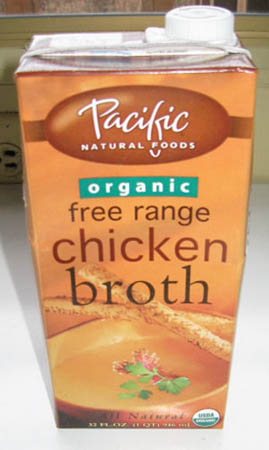
ChickenBrothBut really . . . you need those little turkey bits to make it taste like turkey dressing. If you want the real deal you need to boil up some backs or necks and pick off the meat.

Also . . . salt . . . I taste the dressing as I’m squishing it together and add salt to my taste if it needs it. The breads have salt in them and I can’t be sure how much. I tend to “under salt” as I cook. People can always add what they want at the table.

Now . . . a true confession . . . I love to eat the dressing at this stage. I loved it as a kid. My mom would shudder and say, “You’re eating RAW dressing!!” but she let me do it. It’s not really raw at this point, except for the celery.
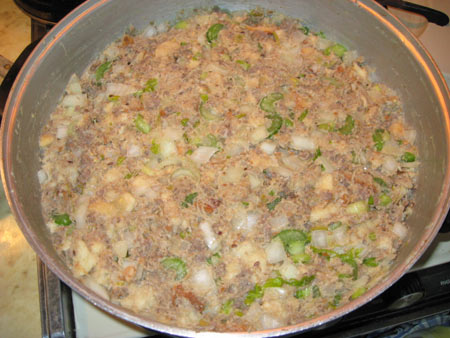
raw-dressing

However . . . before I serve it to the family I bake it at 350º for about 1½ hours. Cover it for the first hour and bake it uncovered for the last half hour. When it’s done it looks like this . . .
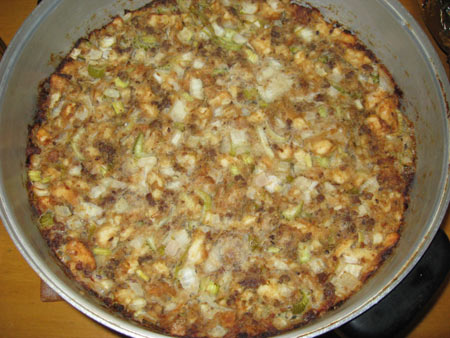
cooked-dressing

For the record? Most of my family loves the dressing more than the turkey. Me too.